Linking MS OneDrive File Uploads
Opening your OneDrive
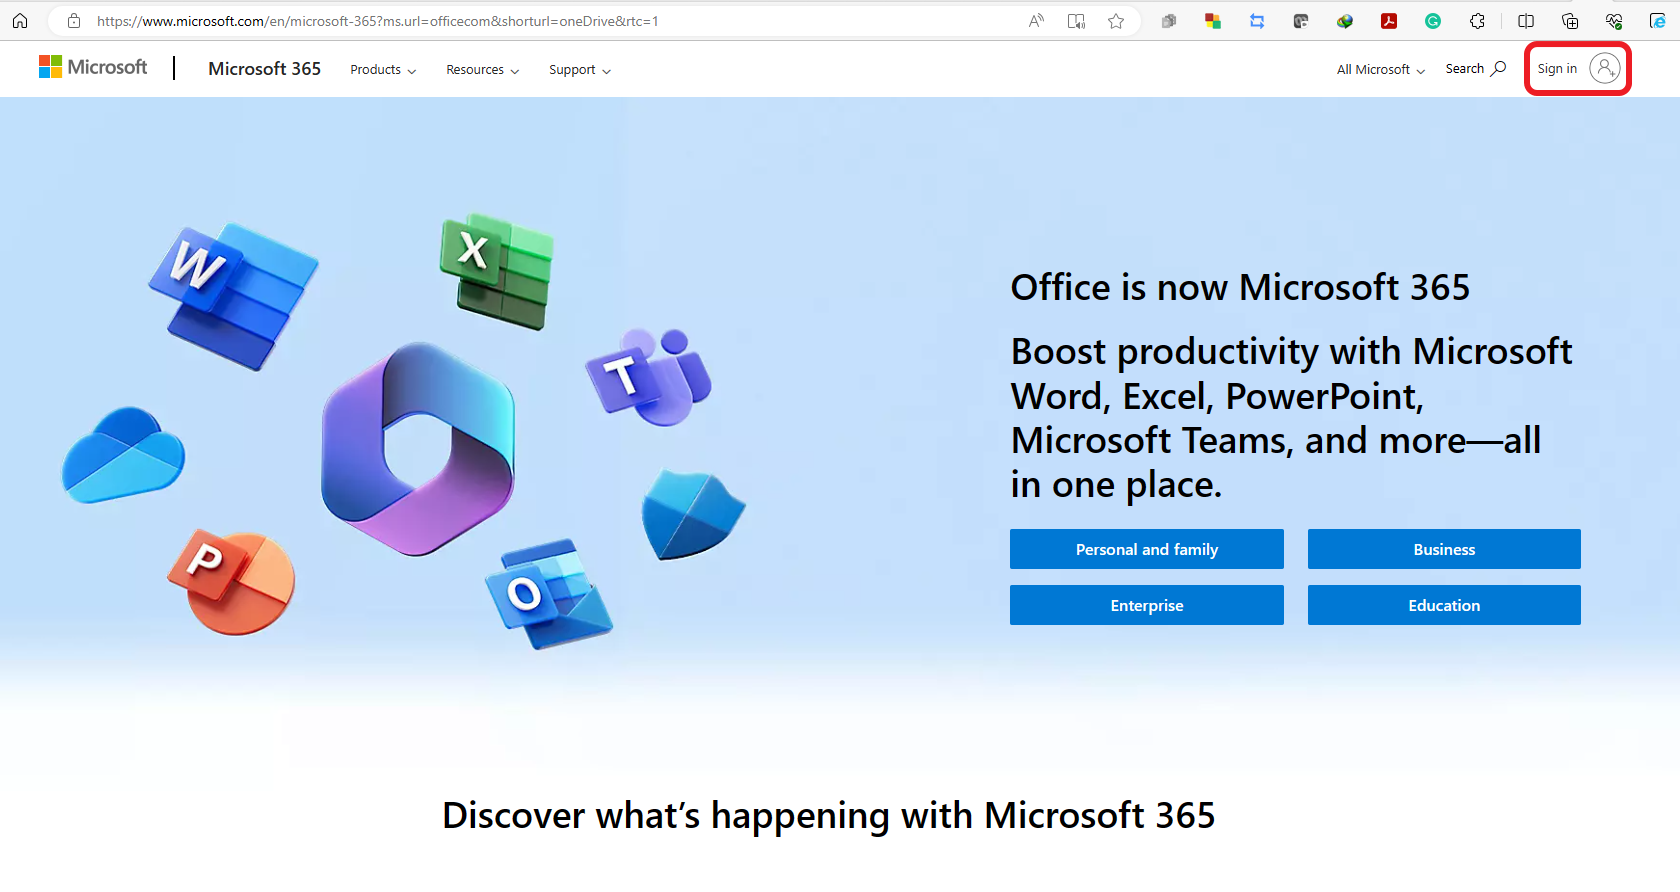
- Open a web browser.
- Navigate to the Microsoft Office homepage: www.office.com
- Click “Sign in” and sign into your Microsoft account.
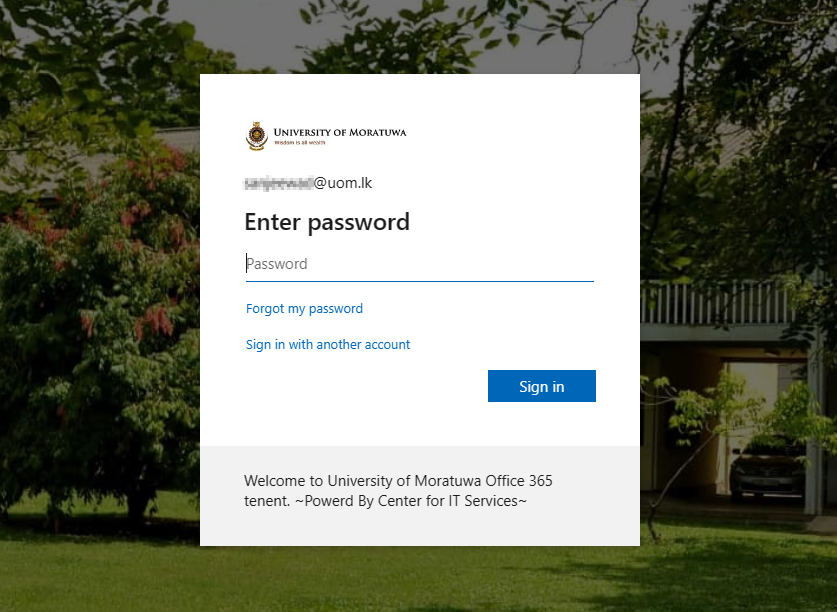
loginLogin to the portal by using your uom email address and the relevant password you have set.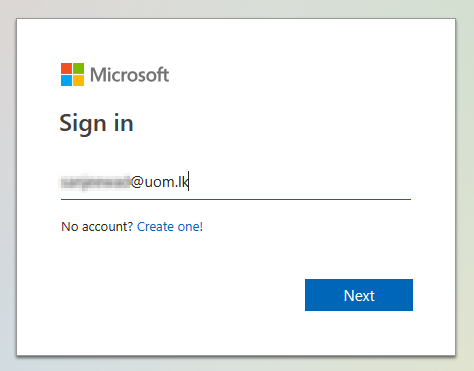

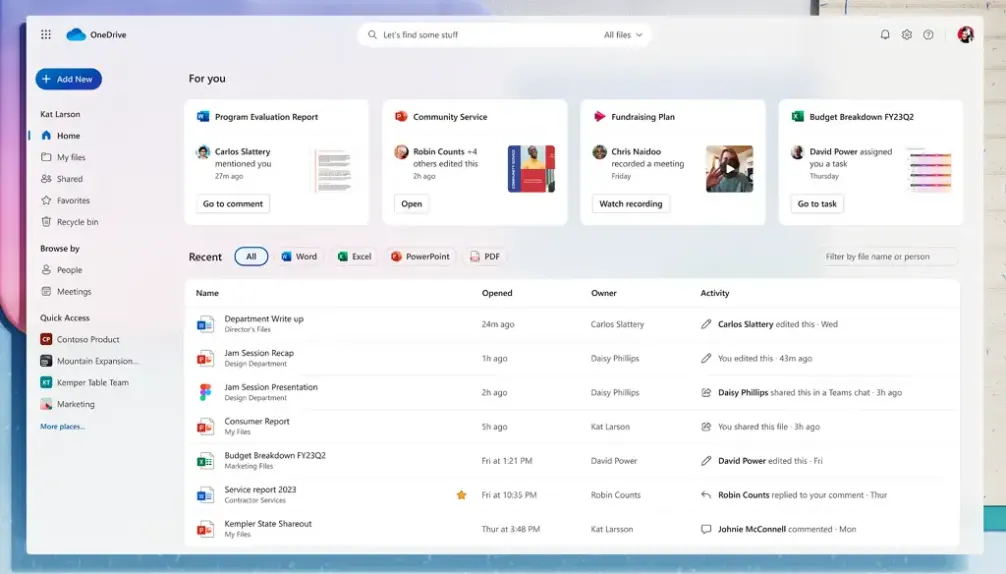
- The Microsoft Office home page is displayed. A listing of the available online apps available to you is revealed. Below is a listing of files you’ve recently accessed in your OneDrive cloud storage.

- All new files that are created through Office.com are automatically saved to a user's OneDrive. Users can store over 320+ different file types in
OneDrive and upload files up to 250 GB in size.OneDrive. Files and folders can be uploaded directly in the browser once signed intoOneDrive:OneDrive
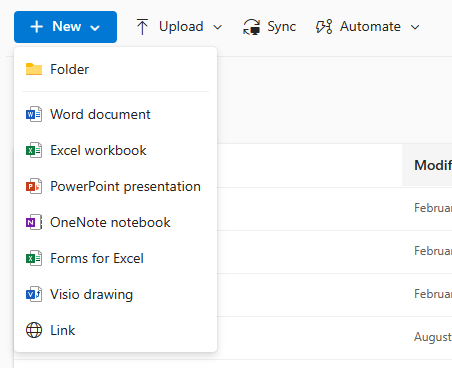
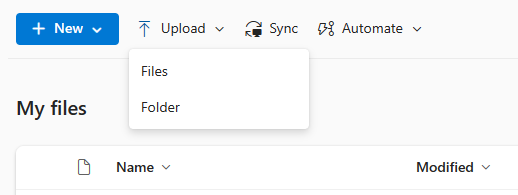
- Click “Upload” near the top of the screen, and then click “Files”.
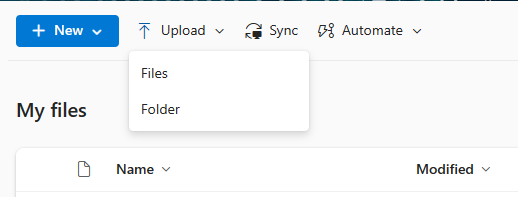
- In the file upload dialog box, navigate to the Downloads folder.
- Select “Library Of Congress.jpg” and click Open.
- Notice how the file has appeared in the content pane.

- Also, notice the three blue lines “coming out” of the letter L in the Library. This symbol means that the file has been recently added.
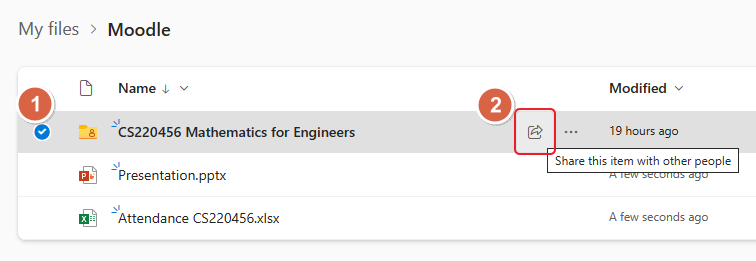
- Select the “CS220456 Mathematics for Engineers” file and click the "Share button".
-
Click on the pencil drop-down button. Then select the Can view option This is what we want.
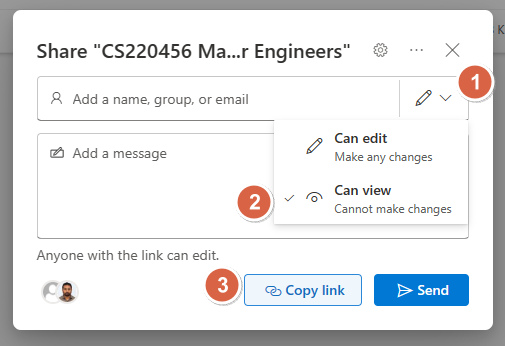
Notice how it is prompting us to enter a name or email address. This is an optional feature that will send an email to whoever we want containing a link to the file. We will not enter any email addresses here because we want to send a public link to our students. - Finally, click "Copy link”.
Clicking the "Copy link" button does two things: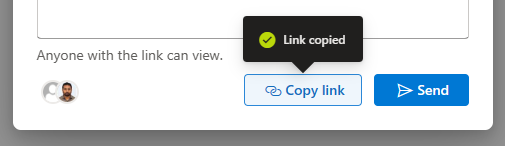
- Applies sharing permissions to the file. The sharing permissions state that anyone who knows the link to the file can view and edit it.
- Copies the link to the file to the clipboard so you can paste it somewhere.
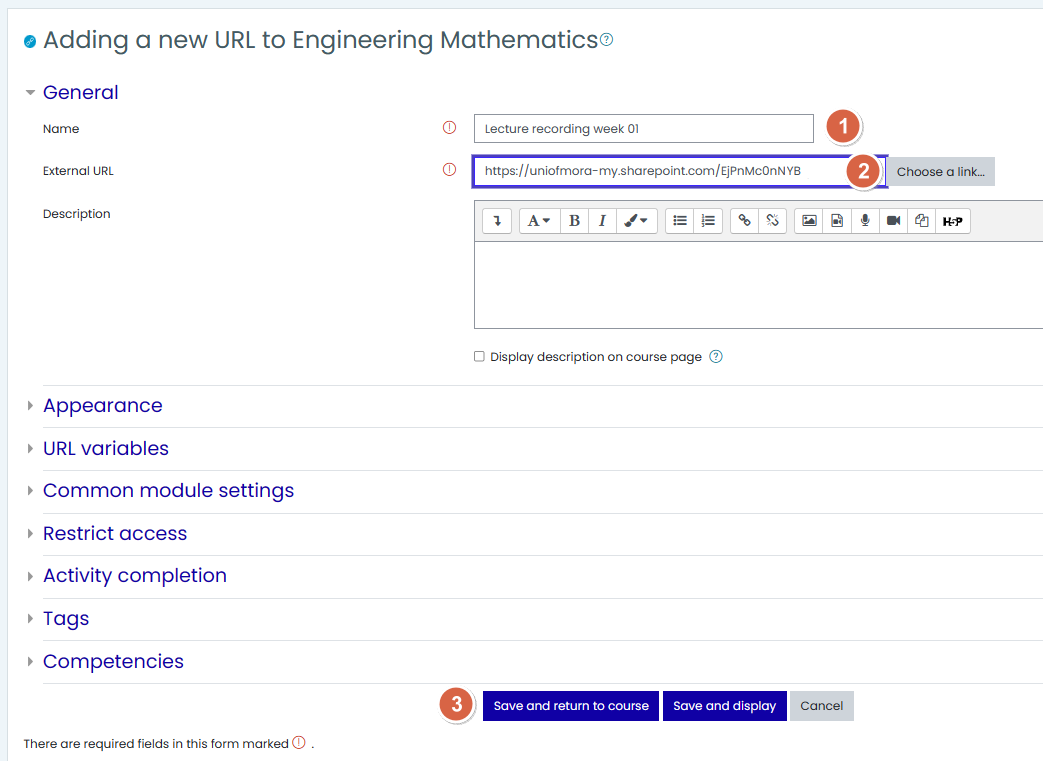
- Upload the shared link to Moodle.
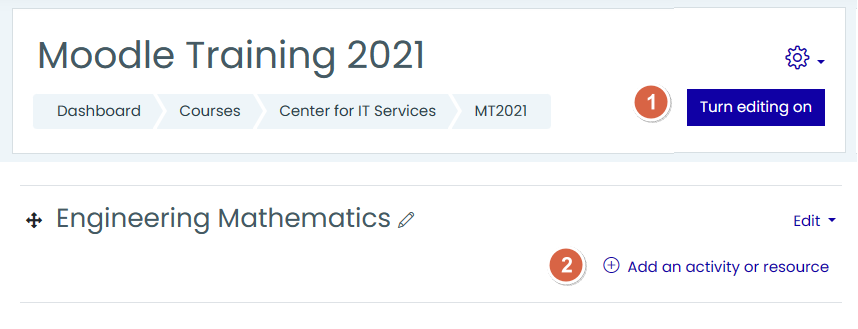
- First, "turn editing on" in your Moodle course.
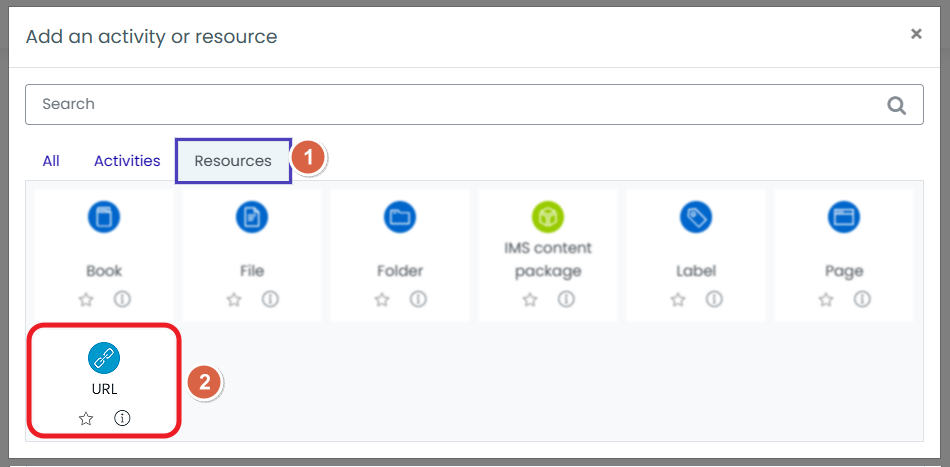
- Then, "Add an activity or resource".
- Select "URL" under the resources tab.

- Add the resource by using an appropriate name and the link you have copied under Step 14. Then, save it.

- Finally, it will display as follows.