# Guidelines for Transferring Students Across Levels/Years
Step 1: Login to the System
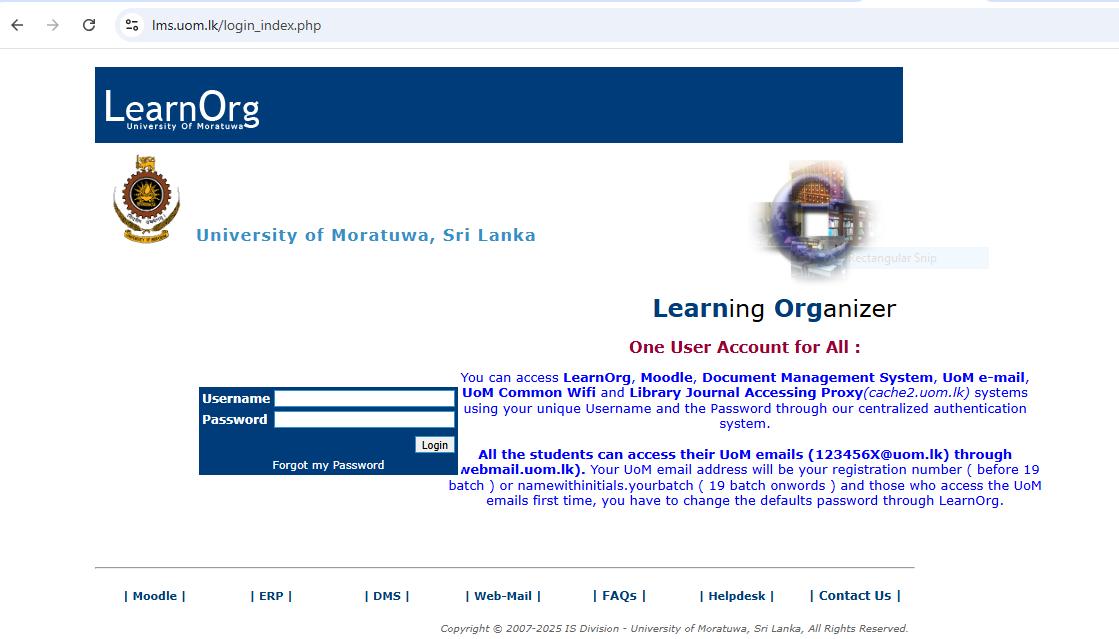
### **Login to the System**
To begin the process of module offering, users must first log in to the Learning Management System (LMS) of the University of Moratuwa.
#### **Accessing the LMS**
- Open a web browser *(recommended: Mozilla Firefox or Google Chrome)* and navigate to the following URL:
[https://lms.uom.lk/login\_index.php](https://lms.uom.lk/login_index.php)
#### **Entering Login Credentials**
- Enter your **Username** and **Password** in the appropriate fields.
- Click the **Login** button to access the LMS dashboard.
⚠️ **Note:** If you have forgotten your password, use the *"Forgot Password"* link on the login page.
[](https://wiki.uom.lk/uploads/images/gallery/2025-05/VfZiOwbT05YmrWFc-figure-1-lms-login-page.PNG)
*Figure 1: LMS Login Page *
Step 2: Transfer All Students to a Different Academic Year/Level
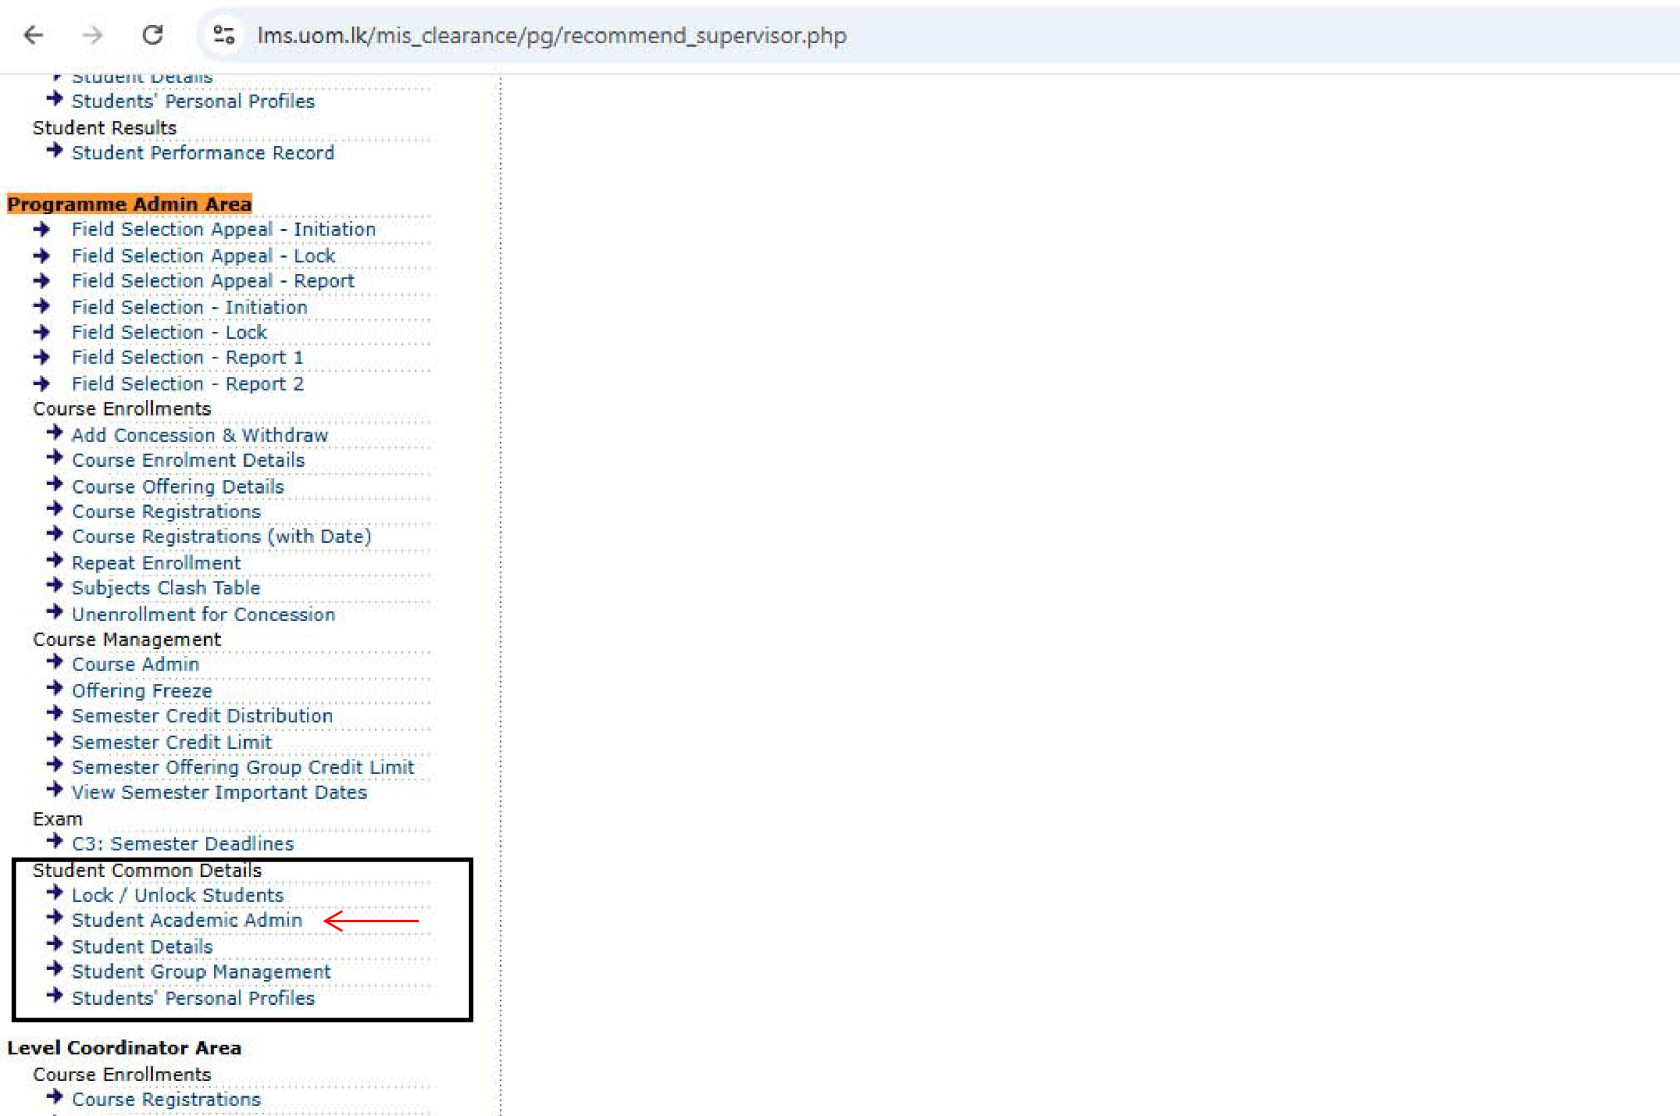
### **Transfer All Students to a Different Academic Year/Level**
Once successfully logged into the Learning Management System (LMS), users can proceed to the **Programme Admin Area**, where they are granted access to **Student Common Details** functionalities.
#### **Navigating to Student Academic Admin**
- From the LMS dashboard, locate the menu on the **left-hand side** of the screen.
- Click on the **“Student Academic Admin”** option to begin the process, as shown in **Figure 2**.
[](https://wiki.uom.lk/uploads/images/gallery/2025-06/l15vp4Ij3Zrco4b2-capture-2-page-0001.jpg)
*Figure 2: *Programme Admin Area and Student Academic Admin**
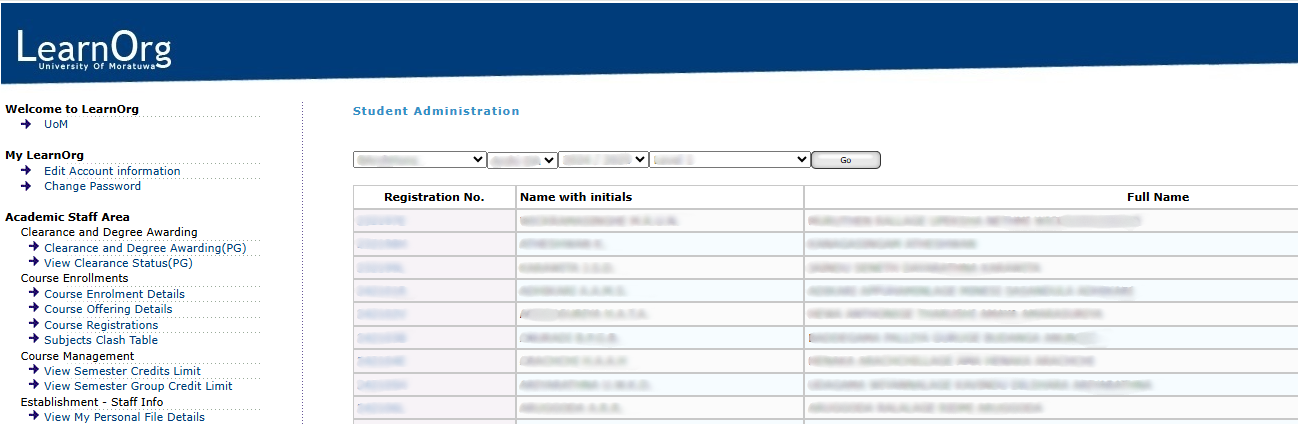
#### **Selecting Degree Programme, Intake/Academic Year**
After clicking on ****Student Academic Admin****, the system will display the interface as shown in **Figure 3**. Follow the steps below:
1. Select the **Degree Programme** using the first dropdown.
2. Select the **Department** using the second dropdown. ⚠️ **Note:** *This will only have one option — the department code relevant to the selected degree programme.*
3. Choose the **Intake/Academic Year** using the third and fourth dropdowns.
4. Click the **Go** button to proceed.
*[](https://wiki.uom.lk/uploads/images/gallery/2025-06/YjPhSlnfMX4XMOef-figure-3.png)*
*Figure 3: Student Academic Admin Interface*
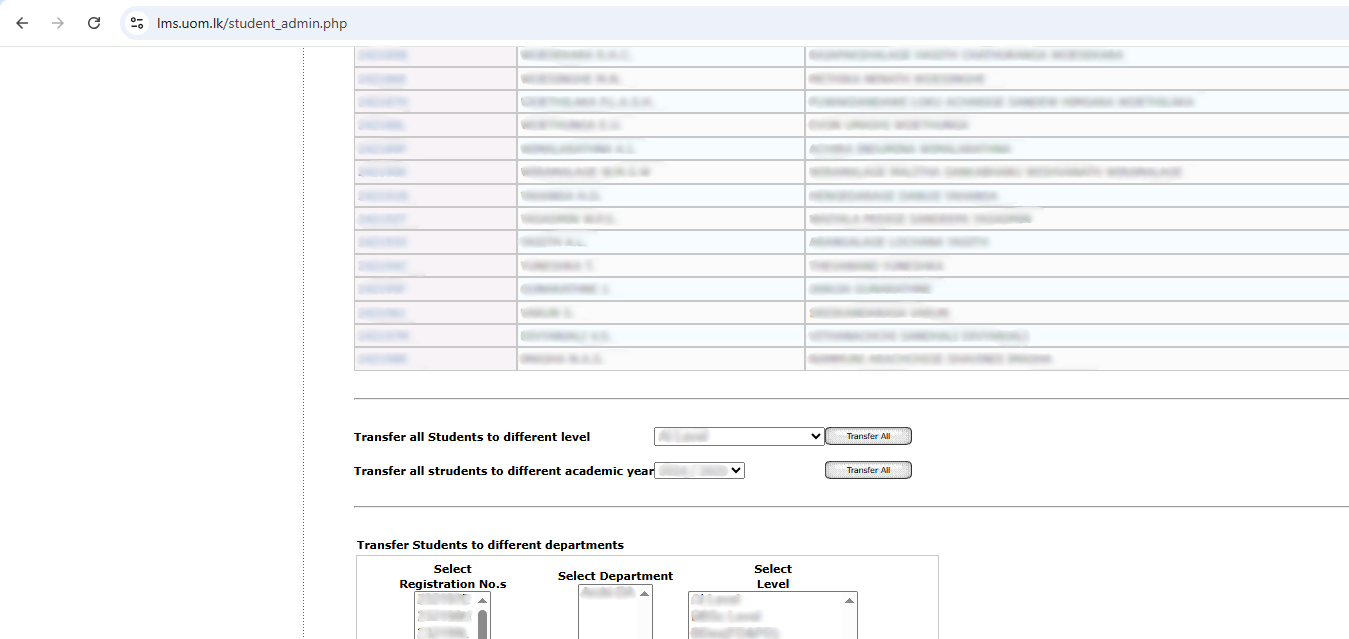
#### **Accessing the Student Transferring Section**
After clicking the **Go** button, the **Student Transferring Section** for the selected batch will appear beneath the student list, as shown in **Figure 4**. This interface allows users to transfer all students to a different **level** or **academic year**.
*[](https://wiki.uom.lk/uploads/images/gallery/2025-06/ddlQXmw5MZPZ9FAP-figure-4.png)*
*Figure 4: Student Transferring Section*
#### **Transferring All Students to Level 6 (Temporary Step)**
**Important Note:** *Not all students progress to the next level simultaneously. Use "Level 6" as a **temporary supportive level** to avoid potential inconsistencies or system conflicts.*
1. Select **“Level 6”** from the **Transfer all Students to different level** dropdown.
2. Click on the **"Transfer All"** button.
All students will be moved to **Level 6** while keeping their **current academic year** unchanged.
#### **Transferring Students to the Correct Academic Year**
1. In the **Student Academic Admin** interface (see Figure 3), search for students who are currently at **Level 6** with their current academic year.
2. From the **Transfer all Students to different academic year** dropdown, select the **correct academic year**.
3. Click on the **"Transfer All"** button.
Students will now be assigned to the **correct academic year**, while still remaining at **Level 6**.
#### **Transferring Students to the Correct Level**
1. Again, use the dropdowns in the **Student Academic Admin** interface to search for students with the **updated academic year** and **Level 6**.
2. From the **Transfer all Students to different level** dropdown, select the **correct level**.
3. Click on the **"Transfer All"** button.
Students will now be fully transferred to the **correct academic year and correct level**.
#### **Final Verification**
To ensure the transfer process is completed correctly:
- Use the dropdown filters in **Figure 3** to search for students with the updated academic year and level.
- Confirm that all records have been updated accordingly.